
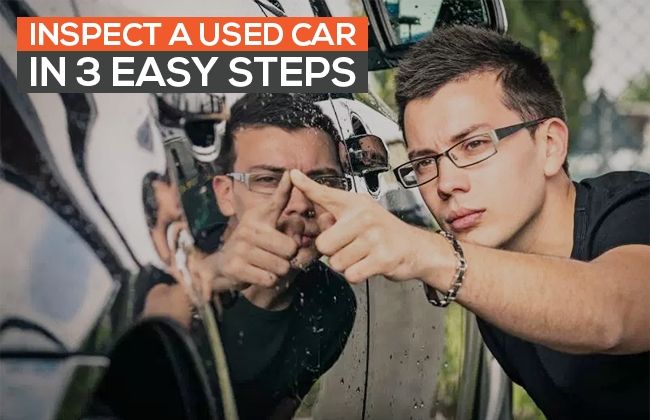
Inspect a Used Car in 3 Easy Steps
Modified On May 11, 2016 02:37 PM By Aman
- Write a comment
After doing your basic research on scouting for a used car, you have now moved one step closer to the right used car for you. Now, you need to pay a visit to the seller and inspect the vehicle personally to insure that it is a fault free purchase.
Although it sounds easy while reading but it’s one of the most difficult and important exercise in finalizing the right used car. As all of us are not car experts, there are some common issues which haunts almost all of us. Questions like, How to inspect the car thoroughly? What points to cover and what to neglect? How do I make sure that I am not buying a faulty car? needs to be answered.
We will take up all of these and more during the course of this article through a step by step approach on what you actually need to do when inspecting a used car.
1. Check out the exteriors first
First things first, the exterior is what you primarily witness and needs to be checked completely from all angles.
- Before being a critic, just observe
Take it easy and take it slow. Before you spot any irregularity or dent on the outside, it’s important to first observe the car on the whole. Just take a quick walk-around and observe areas such as the front bumper, headlights, grille, windscreen wipers, side turn indicators, wheel arches, windows and the boot as well.
- Now check for any dents and repair work
When you are going for a used car, it’s a given that you might encounter some minor dents or scratches to say the least. This is something which you can neglect for the time being as the seller can get that all fixed for you at the time of purchase. Your concern should be to inspect for any major accidental damage which can be detected from the side by inspecting areas such as joints on the doors as well as under-the-side black plastic casing. By taking it off, you will come across punching holes which are done from the manufacturer’s end. A car that has undergone major repair will not have any punching holes. You will either see a welding joint or a complete smooth surface.
When going for a rear check, lift the carpet floor inside the boot and take out the spare tyre as well. Now, check the metal sheet floor just beneath the spare wheel for pasting areas. Pasting done from the manufacturer’s end will be a little rough and widespread. Now, if the car has undergone major damage from the back, you won’t really find any pasting details or if the repairer is smart, you can get a complete smooth surface which can be a matter of concern on the work done. Roof should also be checked. Stand at a height from where you can see the roof clearly. In case of minor dents, ask the seller to fix it. But if you come across a major irregularity in the design, it can be a sign of accidental repair done to a car.
- Examine paint difference and check for rust signs
The paint of the car also speaks about any alterations or damage done in the past. An original factory paint will be the same across all the panels of the car. Do a careful inspection for any difference in the look and feel of the panels by rubbing your hand over the painted surfaces. A factory paint will be very smooth due to multiple coatings, while an aftermarket paint job done will leave a rough surface.
Once the paint check is done, scan corners, joints and under-body areas as well for rust signs. Do not mind bending down and using a flashlight if required when inspecting under-body parts of the car. Rust can be detected by corrosion marks which are dark yellow and brown in colour. Probability of rust signs is maximum on cars which are used in areas which encounter heavy rains or floods.
- Check tyre conditions along with make and year
Tyres are the only point of contact that a car makes with the road. Hence, their healthy condition corresponds to a better economy and performance of the car. To begin with, first check for the brand on all the four tyres including the spare wheel as it should be of the same manufacturer. If there is a mismatch on the brand name, ask the seller for the reason. Average life of a tyre is around 30,000 – 40,000 kilometres ideally, post which it needs to be replaced.
Apart from this, you can also check for a tyre’s age which is printed on the side wall mentioning the month and year of manufacture. By comparing the year of manufacture of the tyres to that of the car, you can get a better understanding of its running. If you are going for a car which has roughly done 40,000+ kilometres, you should ideally get a new set of tyres as the first set would be worn out by now. But in case if you are going for a year old car which has 10,000+ kilometres on the odometer and the tyres are still brand new, that calls for some suspicion regards to changing the tyres despite a lot of kilometres still left on them.
2. Now go for an under the bonnet inspection
After the exterior check, pop the bonnet open and take your time to inspect various elements inside. You can focus on the key areas below:
- Match metallic parts colour
If the car has undergone any major accident, the first thing you can notice is a repaint work under the bonnet especially on the nuts and bolts. Examine the metallic area carefully. Ideally, metallic and fabricated parts should be of the same colour scheme as the car but there will be a marginal difference in the tone inside, so don’t worry about that.
- Engine oil inspection
Engine oil is a vital component for a healthy engine life. Check its level carefully, when the car is cold and not running, by taking out the transmission dipstick from engine’s side mounting. The engine oil should be transparent in nature and should reach the second marker on the dipstick. Rub it with your hands to check for any smudge. If you witness a dark colour that means engine oil needs to be replaced.
- Fluids level check
Fluids such as brake and coolant fluid play a very important role in the overall performance of a car. It is important to check if they are filled to an appropriate level, and possess the right formation.
Both brake fluid and the coolant reservoirs are transparent in nature which makes it easy to check the fluid inside without opening them. Make sure both are filled till the max indicator as mentioned on the outside of the reservoir. Brake fluid colour should be very light in nature whereas a coolant can have either a red, green, yellow or blue colour. If you come across dark colour on any of the fluids, that indicates a replacement.
- Do an engine belt check
Faulty engine belts can cause enormous amount of damage to the car so it’s important to check their condition and ensure a healthy running. When the car is cold and the ignition is off, inspect the belts for wear and tear and ensure that it’s free from any cracks.
3. Step inside and check the interiors
Now it’s time to finally step inside and monitor the overall features and details on offer.
- Spend some time inside
The moment you step in, take your time checking out the entire cabin by seating at multiple seating positions including the front and the rear seats. While doing that, look around and check if you find anything out of place.
- A seat check is a must
The entire time that you will spend inside the car will be on the seats itself, so it’s important to do a check for areas such as stains, holes or scratch marks. If you come across any, notify the seller. When you are at it, recline and retract the front row seats repeatedly to ensure a smooth movement. Once you sit, do check for cushioning and under-thigh support padding to see whether it’s comfortable or not.
- Explore and check interior features
Start with the central console and the dashboard by tapping every button and rotating every dial present. Check the functioning of each feature if it’s working properly or not. Do not restrict yourself to just an AC and audio unit check. Further, move to the driver seat features and check all driver accessible features including the steering wheel controls (if any) and the Multi-Information Display (MID) as well on the instrument cluster.
- Don’t avoid the floor, check it thoroughly
Start by checking the condition of all the floor mats and then remove them and examine the floor underneath. It should be free from any rust or additional tampering. Do not hesitate in sniffing out any foul smell, dents or crack on the floor. Any such sign can indicate rust, or heavy water conditions such as rains or flooding that a car might have gone through.
To quickly brush-up everything, always remember to inspect the car on the above three aspects i.e. 1. Exterior check 2. Under the bonnet check and 3. Interior check. Taking help of all the above pointers will guide you towards the right used car. Once you are satisfied and you still want to be double sure, you can always get a trusted source such as a known mechanic to do a check for you.
2 out of 2 found this helpful


